Not only does that nagging dripping sound have the potential to irritate you, but it also presents three significant problems: higher bills, wasted water and an increased risk of developing catastrophic leaks and water damage. Failing to fix a leaky faucet is like throwing money down the drain. Every extra unnecessary drop drives your water bills up higher and higher, with the potential to add anywhere from $20 to $200 or more to your annual bill. If the cost doesn’t give you pause, maybe the prospect of ending up with water damage or a major plumbing problem that costs thousands of dollars to repair in other areas of your home may motivate you to take action to perform a DIY faucet replacement or hire a plumber.
Whatever prompts you to fix the leak, it’s crucial to get to the bottom of the problem and correct it. Read on to learn more about some of the most common causes of household leaks, along with the steps you need to take to fix one on your own or determine if faucet repairs or replacement from a pro are necessary.
On This Page:
- Causes of Leaky Faucets
- Step by Step Guide to Fixing a Leaky Faucet
- Do You Need to Replace It?
- Hiring a Plumber
- Conclusion
Causes of Leaky Faucets
Unfortunately, faucets don’t stay in working order forever. These mechanical devices are made of many different parts, all of which can become worn out after years of usage. Age, use and deterioration are among the chief causes of leaks. Some causes require a simple fix, while others pose a more complicated problem. Whether your leaking faucet is in the bathroom, kitchen, laundry room or outside, common causes of faucet leaks include:
- Washer Woes: Every time you use your faucet, the washer inside is pressed against the valve seat. Over time, the friction from turning the faucet on and off causes wear on the washer, which inevitably leads to a nagging drip. A washer that’s not sized correctly or installed the right way can also leave your faucet leaking. Replacing it should fix the problem.
- Worn Seals: Sediment accumulates over time inside your faucet, and it can cause wear on the outlet and inlet seals. Regularly cleaning sediment from the inlet and outlet seals can help maintain your faucet. These seals are relatively easy and inexpensive to replace if they’re past the point when a normal cleaning can help.
- O-ring, Oh No: Like washers and seals, O-rings don’t last forever. These small O-shaped discs hold your faucet handle in place and withstand regular friction with repeated faucet use. Over time, the O-ring can wear out or loosen, which causes the faucet to leak near the handle. Replacing it almost always offers a simple fix.
- Loose Parts: Packing nuts and adjusting rings in the stem screw of the faucet are other common components that can cause a faucet to leak from the handle area. Tightening or replacing the packing nut typically fixes this issue.
- Corrosion of the Valve Seat: The valve seat of a faucet connects the faucet to the spout using a compression mechanism. As time passes, water sediment accumulates in this area and corrodes the valve seat, which causes the faucet to leak from the spout. Regular cleaning extends its life.
In rare instances, broken fittings or pipes can cause a leaky faucet by affecting your sink’s water pressure. If you’ve checked all of the other areas and still have a leak, it’s a smart idea to hire a plumber to inspect the pipes. Take a look at some of the common repairs associated with the sinks in different rooms of your home to better anticipate the type of faucet repairs that may be necessary.
Importance of Fixing Leaky Faucets
Without getting to the bottom of the leak’s cause, you run the risk of having an all-out blowout or overflow, which can leave entire rooms soaking wet. That water wreaks havoc on woodwork and floors while leaving surfaces vulnerable to bacteria, mold and mildew growth. In addition, the Environmental Protection Agency estimates that average household leaks waste upwards of one trillion gallons of water every year in the United States. Water is a precious resource that’s necessary to sustain life for humans and animals, so flushing 10,000 gallons of water away for the sake of leaving a leak alone is not the most environmentally responsible choice you can make.
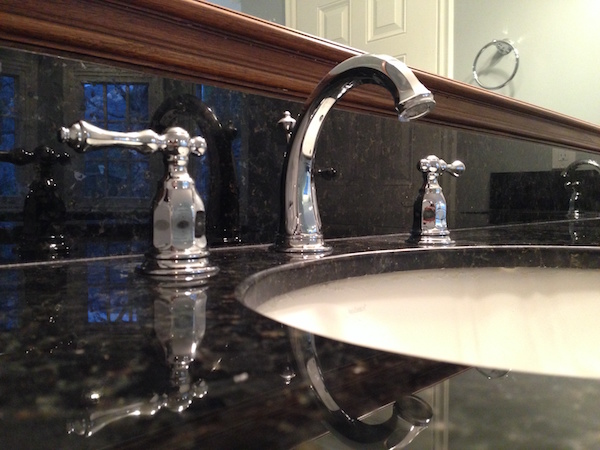
Bathroom Faucets
Average cost: $109
Bathroom sink faucets come in a variety of styles, from ball-type faucets to compression faucets, which commonly leak because they need new seat washers or O-rings. To fix these faucets, remove the decorative cap, unscrew the handle and unscrew the packing nut. Remove the old seat washer and replace it with a new one. Remove the stem from the packing nut and install a new O-ring before putting the faucet back together.
Kitchen Faucets
Average repair cost: $110
Many kitchen sinks use ball-type faucets, which contain a number of parts. This makes it difficult to identify where the leak is coming from, so you might be better off buying a replacement kit and installing all new parts. If you decide to fix the leak rather than replace the faucet, follow these basic steps:
- Remove the handle set screw
- Lift off the handle
- Remove the cap and collar
- Loosen the faucet cam and remove the cam washer and rotating ball
- Use needle-nose pliers to remove the springs and inlet seals
- Cut off the O-rings
- Apply plumber’s grease to new O-rings and install them before installing the new springs, valve seats and cam washers
Laundry Room Faucets
Average repair cost: Less than $100
Laundry room sinks typically feature simple utility faucets, which commonly leak from the spout or handle areas. Because both repairs require you to take the faucet apart, it makes sense to replace the valve stem O-ring and the faucet washer at the same time. Start by removing the handle. Unscrew the valve by turning it to the left with a wrench. Pull the valve out and remove the screw that secures the valve and washer. Install a new washer and O-ring, replace the screw and reassemble the faucet.
Ready to start your faucet repair?
Find Pros
Step by Step Guide to Fixing a Leaky Faucet
Don’t ignore that leak for too long. Even if you’re just a casual DIYer, this is a doable project for you because it requires only some relatively basic plumbing skills. Before you start gathering your tools, take a good look at the leaky faucet to see where the leak is coming from. This should give you a pretty good idea of what part needs repair or replacement. For example, if the faucet is leaking from the spout, the valve seat is probably the problem. If it’s leaking near the handle, it could be because of a packing nut that needs adjusting.
Average Time for This Project: One Hour
Tools and Materials You Need:
- Adjustable wrench and a C wrench
- Flat-head/Phillips-head screwdriver
- Penetrating oil such as WD-40
- Distilled white vinegar
- Nylon scrubbing pad
- Rags
- Replacement parts
Step One: Turn Off the Water
For seasoned plumbing pros, this may seem like an obvious first step, but if this is your first time working on your plumbing, you might not realize the importance of turning the water water supply off, either from the knobs under the sink or the main line to the house. If you skip this step, you risk enjoying a geyser of water shooting from your fixture.
Step Two: Prepare Your Tools and the Faucet
Taking a few minutes to prep your space makes this project run much more smoothly by keeping everything you need close at hand. Wrap the jaws of your wrench with duct tape to avoid scratching your fixture while you’re working. With the water supply turned off, turn the faucet on to relieve any accumulated water pressure and to verify that the supply is off. Close the sink drain and cover it with a rag to avoid losing any small faucet parts while you work.
Step Three: Remove the Faucet Handle/Handles
Remove decorative handle knobs by prying them off the handle using a flat-head screwdriver. You’ll see a screw under each knob that secures the handle to the main body of the faucet. Unscrew each of the screws and remove the handles. If the screws or decorative parts are difficult to remove, use WD-40 to help loosen things up.
TIP: As you start removing parts, take pictures to help you remember how to put them back together. Alternatively, lay them out in a row in the order in which you removed them.
Step Four: Inspect the Packing Nut
Start by loosening the packing nut with a wrench. Once the packing nut is loose, you should be able to see the stem. Remove the stem by twisting or popping it off the valve. Inspect all the parts for signs of damage or corrosion.
Step Five: Inspect the O-Ring and Washer
If the packing nut and stem are in good shape, proceed to inspecting the washer and O-ring located inside the faucet’s valve seat.
Step Six: Clean the Valve
Look at the interior of the valve to see if there are any mineral deposits or gaskets that look like they’ve deteriorated. Loosen the mineral deposits by soaking the affected parts in vinegar and using a nylon scrubbing pad to clean the surfaces. Clean out any clogged holes in the body of the faucet with a pen knife before flushing any debris by holding a rag over the faucet and opening the water supply shutoff slightly.
Step Seven: Reassemble the Faucet
Reassemble the faucet in order of how you removed everything (O-ring and washer, stem, packing nut, screw and handle). If you’re unsure of the exact size you need for your replacement parts, take the old washer and O-ring to your local home improvement store for an exact fit, which is necessary to avoid leaks.
Step Eight: Test the Faucet for Leaks
Once you reassemble the faucet, turn the water supply back on. Turn the faucet on slowly to test it. If you still have a leaky faucet, it may be time to either call a professional or buy a new one.
Do You Need to Replace the Faucet?
If you’ve checked all the usual offenders listed above and you still have a leaky faucet, you might be better off installing a new faucet instead of pursuing professional repairs. This is particularly true if you’re working with an older faucet. These fixtures often don’t last much longer than 10 years. Buying a new faucet also has the added benefit of giving your sink an updated look. When you’re shopping for a replacement, measure the existing one and not how many holes are in the sink for the faucet (one, two or three). Also note whether the holes are widespread or centerset so that you choose a faucet that best fits your sink. Other situations in which replacing the faucet might be the most time- and cost-effective option include:
- The leaking faucet was inexpensive and/or it has non-standard parts that are difficult to find
- The faucet leaks from multiple areas, such as the handle and the spout
- The part you need is only carried in one store, and that store is already closed
- The location of the faucet is a cramped area, and once you put in the amount of work necessary to clean it, you might as well just replace it
- The existing faucet has extensive corrosion
Hiring a Plumber
If you’ve exhausted your personal plumbing abilities and still have a leak, or if you’re not comfortable approaching this as a DIY project, hire a plumber. Getting a professional in on this job provides peace of mind. Additionally, a trained professional can handle some of the bigger causes of problems, such as broken or cracked pipes, to fix the leaky faucet and the underlying issue. Across the United States, the cost of hiring a plumber averages $282. Plumbers may charge by the job or by the hour. Average hourly costs range from $45 to $150, although calling a plumber for an emergency or off-hour project typically costs more.
When you’re hiring a plumber:
- Ask for proof of the plumber’s state-issued license. Most states in the U.S. require plumbers to have a valid license to perform any type of plumbing job. The license should have a phone number that you can call to verify that the plumber has no active complaints.
- Ask the plumber for proof of insurance. As a minimum, look for an individual plumber who has at least $300,000 in liability insurance to cover the costs of any damage that he or she causes during the job. For example, if a pipe bursts or something else happens, the plumber’s insurance should pay for it instead of leaving you liable for the cost of repairing damages.
- Find out how the plumber charges (by the hour or by the job).
- How long he or she estimates the job to take and who will be joining him or her on the job.
- Ask the plumber for references. Call some of the plumber’s previous clients to get a feel for how satisfied they were with the work.
Conclusion
Fixing a leaky faucet can be a fast, easy project, depending on the cause of the leak and the condition of your faucet. Don’t let little leaks create huge floods. Whether you opt to work on this as a DIY project or you want to hire a professional, the faster you stop the dripping, the better. Think about all the money and precious resources that are slipping down the drain with every drip and drop, and start planning.
Ready to start your faucet repair?
Find Pros
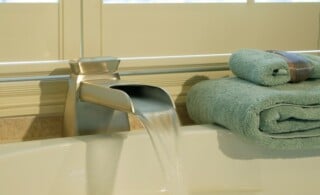 Get Relaxed with Waterfall Faucets
  Tub and Stall Shower Installation
 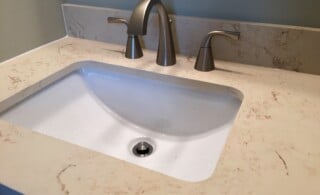 Removing Bathroom Fixtures When Remodeling
  Common Shower Door Problems
 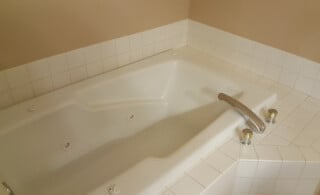 How to Find & Repair a Bathtub Leak

I would be concerned about fixing a leaking faucet…this article list so many causes… I don’t want to waste time, money fixing the wrong part, and then have to call a plumber. Someone more familiar with plumbing could DIY though. Thanks for the steps in case I change my mind!
Very informative. A leaking faucet can increase your water bill and have hidden damage. I enjoyed reading about the step by step guide on how to fix a leaky faucet. If done right, this can save homeowners money and appointment with a plumber.